Home > Blog > November 20, 2013 – Sea Stack Sunset at Cannon Beach, Oregon, and the Photoshop Realistic HDR Technique
November 20, 2013
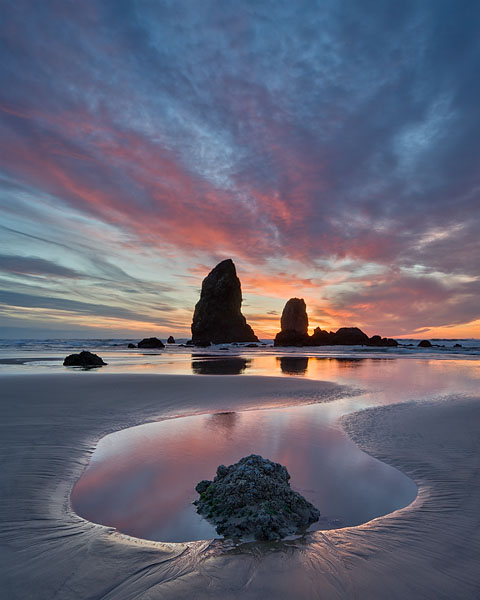
Sea Stack Sunset at Cannon Beach, Oregon, and the Photoshop Realistic HDR Technique

Sea Stack Sunset
Cannon Beach, Oregon, USA
Canon EOS 1D X; 24 TS II; 2-stop hard grad ND; 1/15, 1/8, & 1/4 sec; f8; ISO 100
Image taken on November 19, 2013.
Photoshop Realistic HDR Technique
I tried to process this image using the Lightroom HDR technique, but by mistake I saved the 32-bit merged file as a PSD instead of a TIFF. Lightroom 5 complained that it couldn't read the 32-bit file, so I thought there must be something wrong with Lightroom 5. Because I really wanted to use Adobe Camera Raw (ACR) to do the realistic HDR, I created this Photoshop Realistic HDR Technique.- In Bridge, select the bracketed photo series RAW files, or already-processed TIFF files, then select Tools > Photoshop > Merge to HDR Pro…
- Wait for the images to load into Photoshop CC
- Click the "Remove ghosts" box, set the Mode to "32 Bit" and check the "Complete Toning in Adobe Camera Raw" box, then click the "Tone in ACR" button
- Wait for Photoshop CC to create the 32-bit file and launch the ACR window
- Use the Exposure, Highlights, and Shadows sliders to develop the file w/o worrying about the typical HDR tone mapping controls
- Click "OK" to create the 32-bit file in Photoshop CC
- Convert it to a 16-bit file to continue processing:
- Select Layer > Flatten Image
- Make sure that the default color space is correct (for example, RGB is set to "ProPhoto RGB") by selecting Edit > Color Settings…
- Select Image > Mode > 16 Bits/Channel…
- Set the Preset to "Flat"
- Click "OK"
- Continue to process the 16-bit image as usual in Photoshop CC
Categories:
This particular blog entry is www.jameshagerphoto.com/blog/?date=2013-11-20. Visit www.jameshagerphoto.com/blog to view the latest blog entry, and you may click here to create a URL that you can bookmark to go to the latest blog entry.


